
This is a detailed guide on how you can easily integrate SeerBit on your website to enable successful payments.
Integrating the SeerBit WooCommerce plugin into your website makes it easy to receive payments from your customers anywhere in the world. With reliable payment options (Cards, MoMo, and Bank Transfer) you would reduce your cart abandonment and boost your checkout experience, which means happy customers and more sales.
Follow these detailed steps in integrating the SeerBit plugin into your WooCommerce site.
To be able to continue with this process, you need to have the WooCommerce plugin installed. If you haven’t done that yet, here is how to get started.
- Log into your WordPress dashboard.
- Navigate to the plugins section, search, install and activate the WooCommerce plugin or you can manually download it here
If/When you have the WooCommerce plugin installed, follow these steps
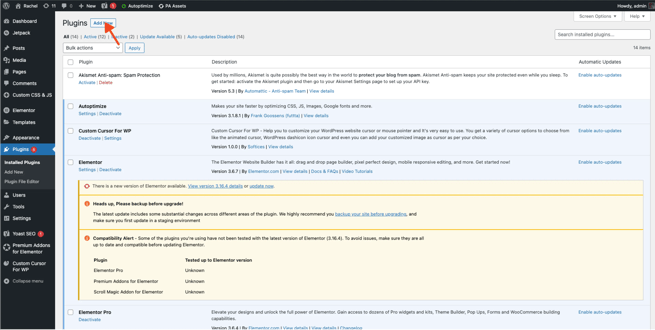
- Click on "Add New" to browse for the SeerBit plugin in the plugins section and then click on “Install Now” next to it.
.webp?width=655&height=330&name=Install%20plugin%20(1).webp)
- After installation, click on "Activate" to activate the SeerBit plugin
.webp?width=655&height=328&name=Activate%20plugin%20(1).webp)
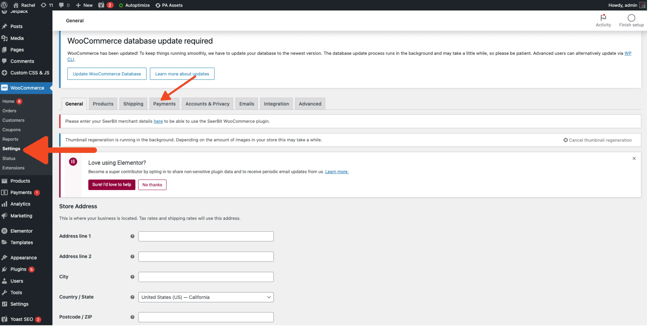
- Hover on the WooCommerce tab on the left navigation menu to reveal a dropdown of options. Select the "Settings" option and locate “Payments” under the configurable options on the page.
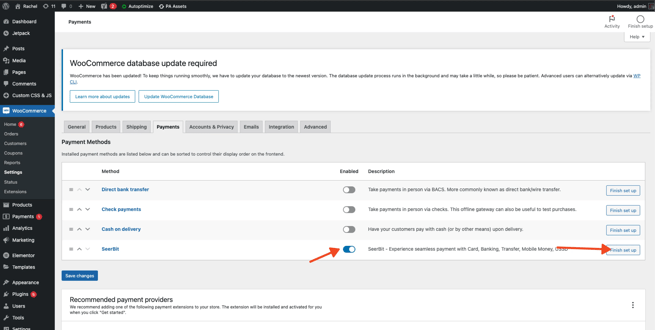
- From the payment methods provided, find SeerBit. Then click on the toggle to enable SeerBit Payments solutions, and click on “finish set up” to configure it.
- On the configurations page, enable SeerBit by selecting “Yes.”
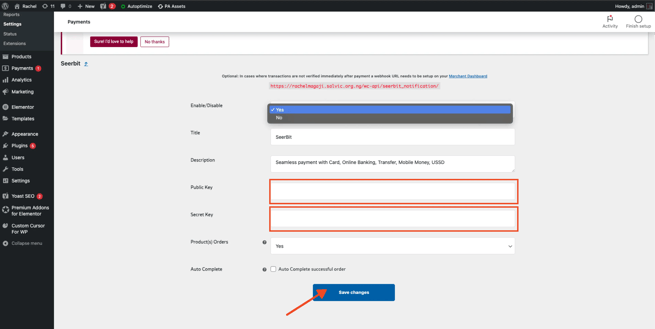
- You would be asked to provide the Public and Secret keys, which can be retrieved from your SeerBit dashboard. See this article on How to find your API keys
You can go ahead to create a SeerBit account if you do not currently own one, but if you already own an account you can proceed to copying and pasting your API keys. Finally, click save changes to start processing payments.